The 7 Plugins I Use on My Master Chain
The process of making a hit song is not complete without the final portion of the engineering process, the mastering. Mastering is simply enhancing your mix. It’s all about cleaning up your final mix by making slight EQ adjustments, adding compression, and squashing the snot out of it to ensure your song reaches commercial volume level. When it comes to mastering, I prefer to keep everything simple and strategic. At the end of the day, a master cannot save a bad mix. Make sure to compare the quality of your mix against a commercially mastered track. Getting the quality of your mix as close as possible to a mastered track will ensure your mix is top notch. Today I am sharing with you every single plugin I use on my master chain to bring out the best qualities of my mix.
#1. EQ
Fabfilter Pro-Q3
Before adding compression in my mix, I always make sure to EQ first. When you compress, you are bringing out frequencies that will enhance any noisy or unwanted frequencies in your track, so I like to get rid of those first. The same goes for my mastering chain. I always start off with an EQ to roll off any harsh frequencies in the high-end and any muddy frequencies in the low-end. I also love adding a 0.5-2 dB of gain between 800-900hZ to give my track a nice warm body. I also recommend a boost at 23,000hZ which will bring air and clarity to your mix. Be careful when boosting or subtracting frequencies. Mastering is all about surgical procedure, so don’t boost or cut any more than 2-3 dB.
#2. Parallel Compression
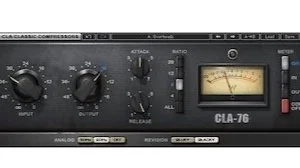
Waves CLA-76
Previously I mentioned to never add compression without adding EQ first. Well, parallel compression is an exception. You can either add it before or after the EQ stage, but I prefer to add parallel compression first. In fact, it is the first thing I do in the mastering process. First, duplicate the mix you have loaded up so that you have two versions of your mix. Mute one version and add a compressor to the other unmuted track. Add heavy compression, bring your fader down to zero, unmute the other version of your mix, then blend the compressed version by slowly bringing up the fader. Parallel compression will make your mix sound full, punchy, and bring up the volume of the quieter parts in your mix.
#3. Side EQ
Izotope RX-10 EQ
Side EQ is one of the most important parts of the master process and will greatly enhance the quality of your mix. For those who don’t know, Side EQ helps to solo out the stereo frequencies and fix any issues in your stereo field. For example, any bass frequencies in your track should be set in mono. If you have a bass that is creeping into the stereo field, adding side EQ and rolling off 60-80hZ is a great way to ensure your bass is staying in mono, and helps to clear away any cloudiness in your mix. I personally like to add 0.5-2dB of gain between 11,000-20,000hZ which helps your track sound bright and crispy. I use the Ozone 9 Equalizer plugin, set it to“Mid-Side,” select “Side,” and begin making these few minor adjustments. Side EQ is another great tool to help your instruments and drums wrap around your vocals to help them sit better in the mix.
#4. Tape Saturation
Slate Digital VTM
This is without a doubt my favorite part of the mastering process. Adding tape saturation enhances your mix immensely and really makes your track sound like an industry level song. Tape saturation is another form of distortion which makes your mix sound full, warm, and alive.
#5. Exciter
Waves Apex Vintage Aural Exciter
Exciters are a great way to add character and energy to your mix. Adding this to your master chain will make your song hit harder. I personally use the built-in exciter that comes with Ozone 9. I start by bringing up the amount to around 2.5, then slowly backing off the mix knob to anywhere between 10-30%. The amount varies from song-to-song. Remember, mastering is all about gentle boosts and cuts, so don’t go too crazy with it. You only need a small amount to really give your track life.
#6. Soft Clipper
T-Racks Classic Clipper
Many believe that limiters are what give your track the most volume. In my opinion, limiters destroy the quality of your mix. Instead, try using a soft clipper. Unlike limiters, soft clippers work by adding a slope which helps you push the gain to the max without it hitting the ceiling directly. The TRS Classic Clipper plugin by T-Racks is an incredible way to get the most volume out of your mix. Just crank the gain knob until you reach about -3dB of gain reduction.
#7. Limiter
Waves L2 Limiter
Previously I mentioned that I don’t like limiters because they destroy the quality of a mix. In this context however, I am not using the limiter to gain volume, I am using it to add a ceiling to capture the peaks of my track. Set the ceiling to -0.2dB and slowly bring down the threshold until you get around -2dB of gain reduction. This will help contain the quality of your mix while also helping it stay even in volume all throughout.
Mastering is just as important as mixing, and with the right knowledge and tools, you too can have a professional sounding final product right at your fingertips. Make sure to be careful, strategic, and conservative during this process to avoid ruining the quality of your mix.


